Aesthetic Photo Editor with Stories
Aesthetic Photo Editor with Stories app is your one-stop shop for creating beautiful content. Every feature is hand-crafted to help you achieve the aesthetic of your dreams.

Are you looking to take your photos to the next level? Look no further than our aesthetic photo editing app! Our app is specifically designed to help you achieve the beautiful, on-trend aesthetic you’ve been dreaming of.
Our powerful photo editor pro makes it easy to create high-quality works of art without any professional skills. With just a few simple touches, you can enhance your photos, add preset effects, and even add text and borders to create the perfect story.
Whether you’re looking to enhance your personal photos or create stunning content for your social media platforms, our app has everything you need to make your images pop. Plus, with instant saving and sharing features, it’s never been easier to showcase your beautiful creations to the world.
So what are you waiting for? Download our aesthetic photo editing app today and take your photos to the next level
Library :-
Step 1:- To open the Aesthetic Photo Editor with Stories application on your PC or laptop, you can follow these steps:
Make sure you have downloaded and installed the Aesthetic Photo Editor with Stories application on your PC or laptop.
Open the application by clicking on its icon in your desktop or start menu.
Once the application is open, look for the Library icon and click on it. This will open your image library within the application.
To add images to the library, click on the plus icon and select the images you want to add from your gallery. You can select multiple images at once if you want to add them all.
Now you can start editing your images by selecting one from the library and using the various tools and features available within the application.
By following these steps, you can easily open the Aesthetic Photo Editor with Stories application on your PC or laptop, and start editing your images with ease.
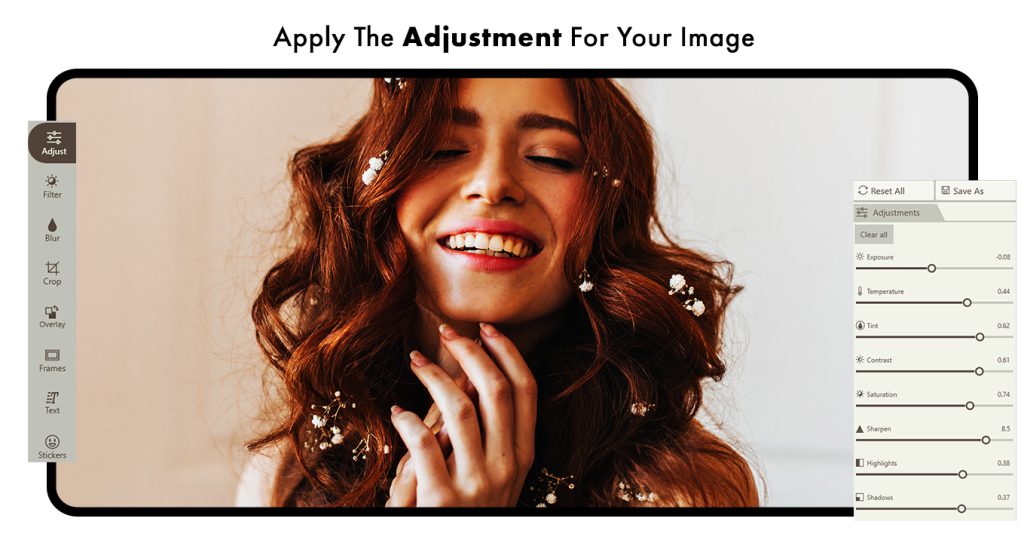
Step 2:- To enhance the quality and appeal of your images, you can use the Adjustment Button. Here’s how you can use it:
Open the Aesthetic Photo Editor with Stories application and select the image you want to edit from the library.
Click on the Adjustment Button available in the editing panel. This will open up various adjustment options to enhance your image.
You can use the exposure adjustment option to brighten or darken the image. The temperature and tint options can be used to adjust the color balance and tone of the image.
Other adjustment options available include contrast, saturation, sharpen, highlights, shadows, and many more. You can easily use them one by one and see the changes in real time.
To apply any adjustment, simply click on the adjustment option and adjust the slider according to your preference.
You can also compare the edited image with the original one by clicking on the compare button.
Using the Adjustment Button, you can easily adjust and fine-tune the various aspects of your image to create the perfect aesthetic. So, start using it today to make your images stand out!
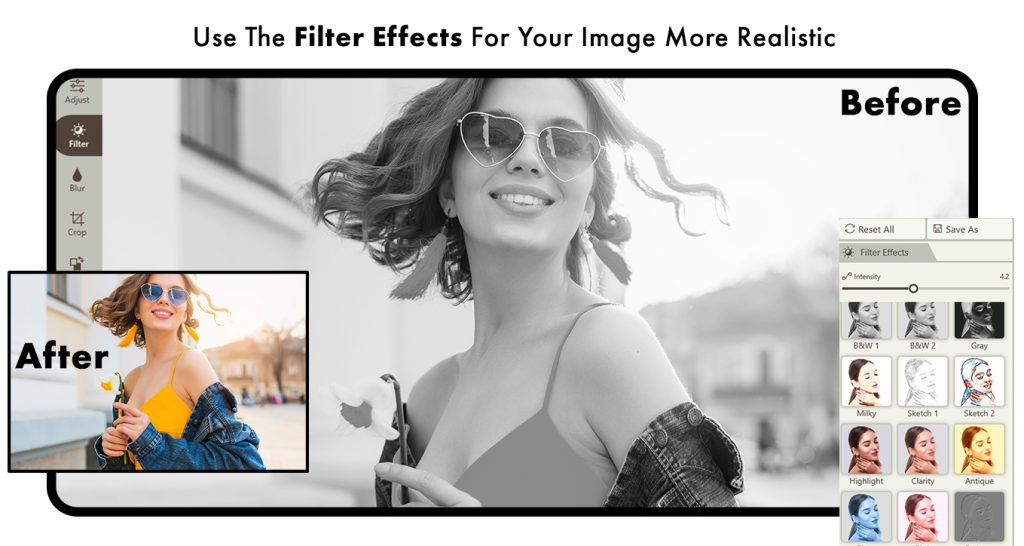
Step 3 :- To add a touch of style and mood to your images, you can use the Filter option available within the Aesthetic Photo Editor with Stories application. Here’s how you can use it:
Click on the Filter option available in the editing panel. This will open up a wide range of filter effects for your image.
You can choose from a variety of filter options such as vintage, black and white, cinematic, and many more. Each filter option has a different effect on the image and can help to create a more realistic and aesthetic look.
To apply any filter, simply click on the filter option and see the changes in real time. You can adjust the intensity of the filter by using the slider available.
You can also compare the edited image with the original one by clicking on the compare button.
Using the Filter option, you can add more personality and depth to your images, and make them look more realistic and aesthetic. So, start using it today to give your images that extra touch of style and mood!
Step 4:- In addition to adjusting exposure, temperature, and applying filters, you can also crop your image to a specific size or aspect ratio to fit your needs within the Aesthetic Photo Editor with Stories application. Here’s how you can use it:-
Click on the Crop option available in the editing panel. This will open up various crop options for your image.
You can choose from a variety of aspect ratios like 1:1 for Instagram, 16:9 for YouTube, or even a custom ratio to fit your specific needs.
To crop the image, simply drag and adjust the border of the image to the desired size and click on the checkmark button to apply the changes.
Additionally, you can also use the Blur option to add a blur effect to your image. Simply click on the Blur option and choose your favorite color for the blur effect.

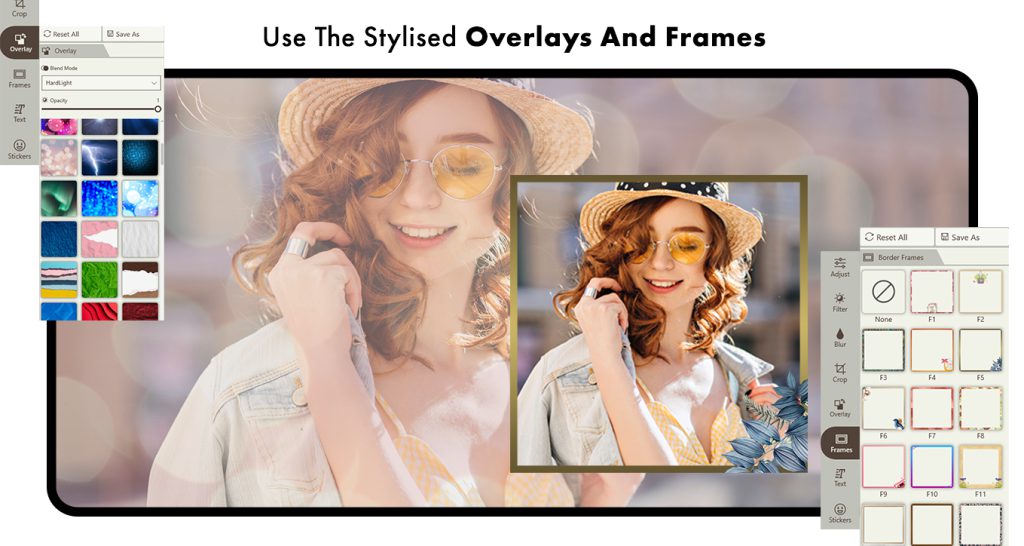
Step 5:- To add a creative touch to your photos and stories, the Aesthetic Photo Editor with Stories application offers various Overlays and Frames options. Here’s how you can use them:
Click on the Overlays option available in the editing panel. This will open up a range of overlay options to choose from.
You can choose from a variety of overlay options such as light leaks, bokeh, textures, and more. Each overlay option has a different effect on the image and can help to create a more unique and creative look.
To apply an overlay, simply click on the overlay option and adjust the intensity of the overlay effect using the slider available.
Next, you can click on the Frames button available in the editing panel. This will open up various frame options to choose from.
You can choose your favorite color for the frame by selecting it from the color palette available. You can also adjust the thickness of the frame using the slider available.
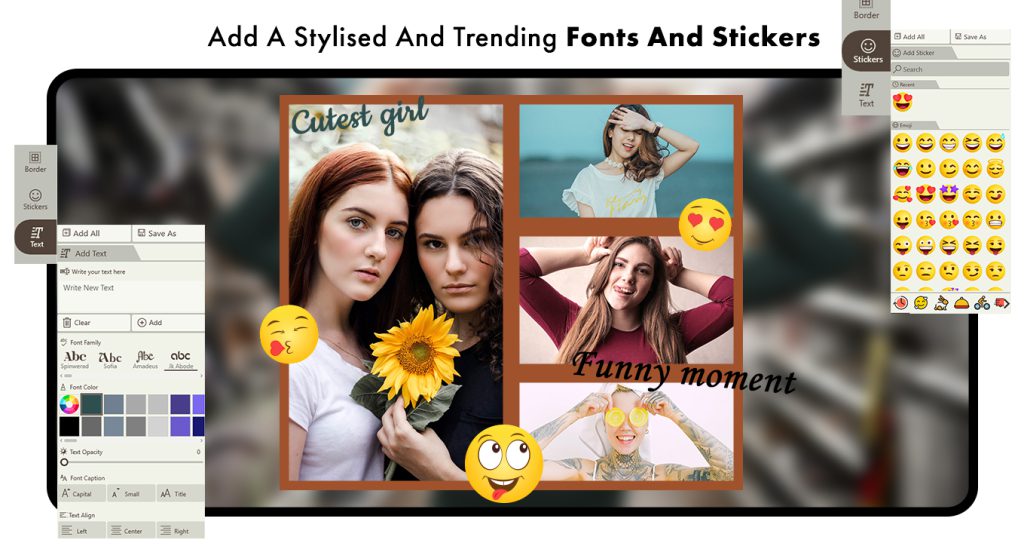
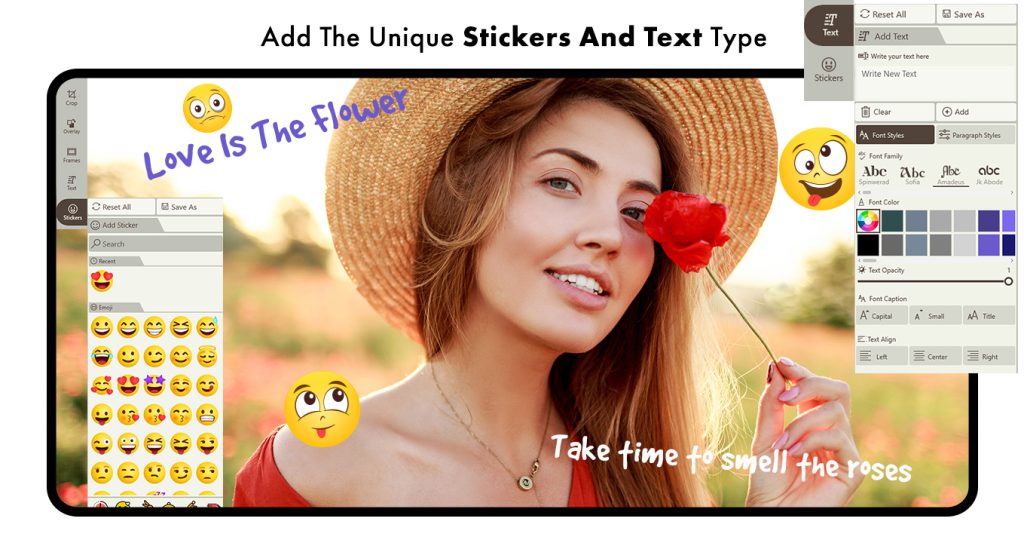
Step 6:- In addition to adding overlays and frames, the Aesthetic Photo Editor with Stories application also offers Text and Stickers options to help you create unique and engaging stories. Here’s how you can use them:
Open the Aesthetic Photo Editor with Stories application and select the image you want to edit from the library.
Click on the Text button available in the editing panel. This will open up a text editor that you can use to add classic text stories to your image frames.
You can change the font style and text color to match your preferences. You can also set the opacity of the text to make it more or less visible.
Additionally, you can use the Stickers button available in the editing panel to add trending stickers to your stories. The app offers a variety of stickers that you can use to enhance the visual appeal of your stories.
After editing your image, click on the Save button to save the edited image to your device. The app provides several options to choose from when saving, such as image quality and file format.
Once saved, you can also share your edited image on your social media platforms by clicking the Share button. The app provides several options to choose from when sharing, such as the platform, caption, and image quality.
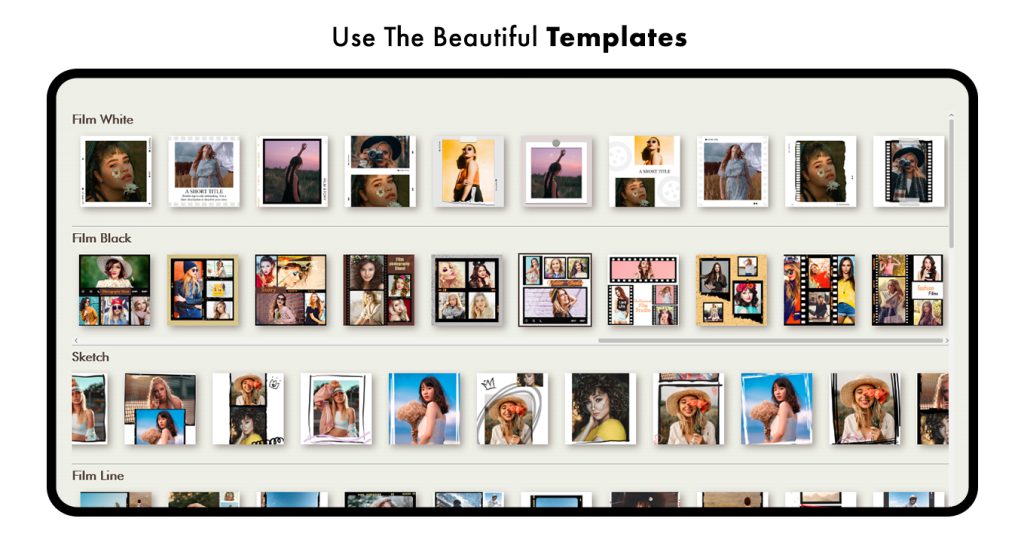
Templates
Step 1 :- To use the various template options available in the Aesthetic Photo Editor with Stories application, follow these steps:
From the available options, choose the category of templates that you like. The app offers a range of categories such as Film white, Film Black,Sketch,Film Line, Angle, floral, and more.
Select a template from the chosen category and click on it to open it up.
Once you’ve selected the template, click on the individual frames available in the template. This will bring up a plus icon that you can click to add your own image to that frame.
You can add images to the frames one by one by clicking on the plus icon for each frame and selecting an image from your device. Alternatively, you can click on the “Add Images” button available on the upper right-hand side of the editing panel and select multiple images at once.
Once you’ve added images to all the frames in the template, you can use the editing tools available in the app to further enhance the images and add your own creative touch.
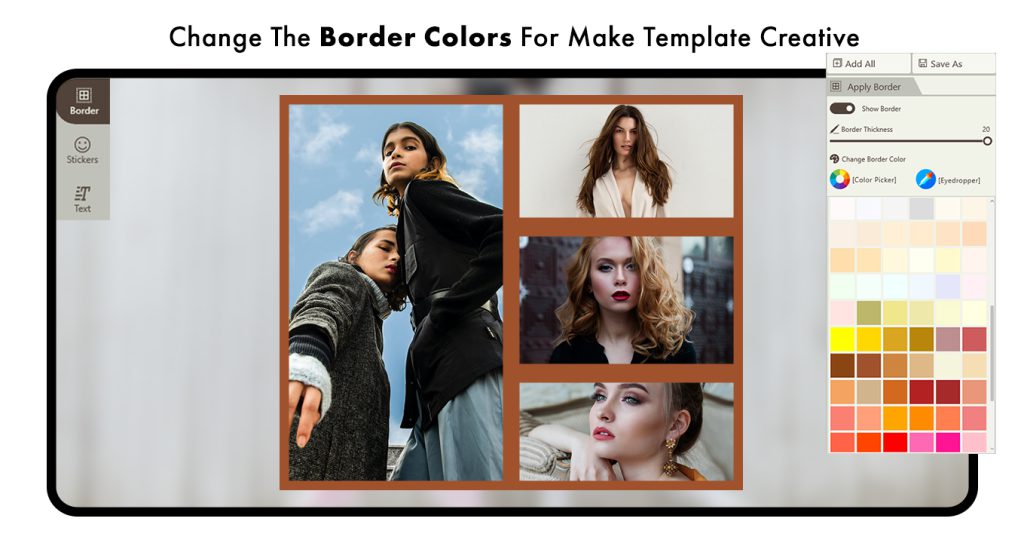
Step 2 :- To add borders to your images using the Aesthetic Photo Editor with Stories application, follow these steps:
Click on the Border option available in the editing panel.
Choose your favorite color for the border and apply it to the template frames. The app offers a range of color options that you can choose from.
You can adjust the thickness of the border by using the slider available in the editing panel.
Once you’ve applied the border to your template frames, you can use the editing tools available in the app to further enhance the images and add your own creative touch.
Step 3 :- Next option click on stickers button and apply stickers on your template storie creation.
- click on text button and write a meaningfull text on your templete stories creation.
All Done ! Click on save button and save your stories creation on your system . Also you can share your stories family and friends.